Problems on the Road
Here youíll find what to do about some problems that can occur on the road.
Your hazard warning flashers let you warn others. They also let police know you have a problem. Your front and rear turn signal lamps will flash on and off.
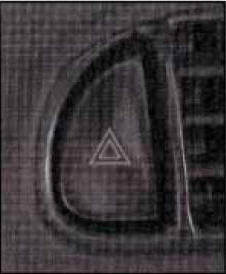
Press this button to make your front and rear turn signal lamps flash on and off.

The hazard warning flashers will work once the button is pressed, regardless of the key position.
To turn off the flashers, push the hazard button. When the hazard warning flashers are on, your turn signals won't work.
If you carry reflective triangles, you can set one up at the side of the road about 300 feet (100 m) behind your vehicle.
If your battery has run down, you may want to use another vehicle and some jumper cables to start your Corvette. But pleaseu se the following steps to do it safely.
NOTICE:
Ignoring these steps could result in costly damage to your vehicle that wouldnít be covered by your warranty. Trying to start your Corvette by pushing or pulling it could damage your vehicle, even if you have a manual transmission. And if you have an automatic transmission, it wonít start that way.
Caution:
Batteries can hurt you. They can be dangerous because:
They contain acid that can burn you.
They contain gas that can explode or ignite.
They contain enough electricity to burn you.
If you donít follow these steps exactly, some or all of these things can hurt you.
1. Check the other vehicle. It must have a 12-volt battery with a negative ground system.
NOTICE:
If the other system isnít a 12-volt system with a negative ground, both vehicles can be damaged.
5-3
2. Get the vehicles close enough so the jumper cables can reach, but be sure the vehicles arenít touching each other. If they are, it could cause a ground connection you donít want. You wouldnít be able to start your Corvette, and the bad grounding could damage the electrical systems.
3. Turn off the ignition on both vehicles. Unplug unnecessary accessories plugged into the cigarette lighter or accessory plug. Turn off all lamps that arenít needed as well as radios. This will avoid sparks and help save both batteries. In addition, it could save your radio!
NOTICE:
If you leave your radio on, it could be badly damaged. The repairs wouldnít be covered by your warranty.
4.
Open the hoods and locate the batteries. Find the positive (+) and negative (-) terminals on, each.Caution
An electric fan can start up even when the engine is not running and can injure you. Keep hands, clothing and tools away from any underhood electric fan.
5-4
Caution
Using a match near a battery can cause battery gas to explode. People have been hurt doing this, and some have been blinded. Use a flash light
if you need more light.Be sure the battery has enough water. You donít need to add water to the Delco Freedom@ battery installed in every new GM vehicle. But if a battery has filler caps, be sure the right amount of fluid is there. If it is low, add water to take care of that first. If you donít, explosive gas could be present.
Battery fluid contains acid that can burn you. Donít get it on you. If you accidentally get it in your eyes or on your skin, flush the place with water and get medical help immediately.
5. Check that the jumper cables donít have loose or missing insulation. If they do, you could get a shock. The vehicles could be damaged, too.
Before you connect the cables, here are some basic things you should know. Positive(+ ) will go to positive (+) and negative (-) will go to an unpainted metal engine part or a body metal surface Don. ít connect positive (+) to negative (-) or you will get a short that would damage the battery and maybe other parts, too. And donít connect negative (-) to negative (-) on the dead battery, as this can cause sparks. Follow Step 9 carefully.
CAUTION:
Fans or other moving engine parts can injure you badly. Keep your hands away from moving parts once the engine is running.
5-5
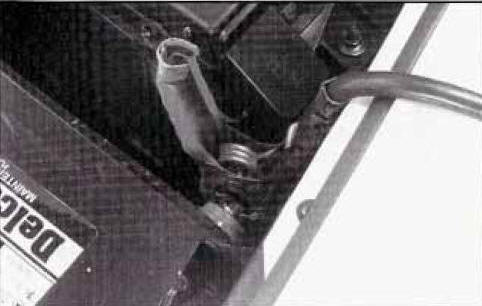
6.Positive (+) goes to positive (+) and negative (-) goes to a metal engine part. Connect the red positive (+) cable to the positive (+) terminal of the vehicle with the dead battery. Use a remote positive (+) terminal if the vehicle has one.
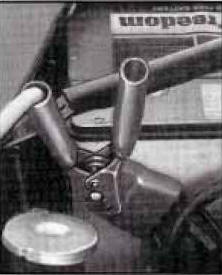
7.
Donít let the other end touch metal. Connect it to the positive (+) terminal of the good battery. Use a remote positive (+) terminal if the vehicle has one.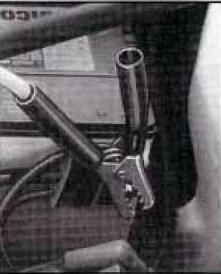
8. Now connect the black negative (-) cable to the good batteryís negative (-) terminal. Donít let the other end touch anything until the next step.
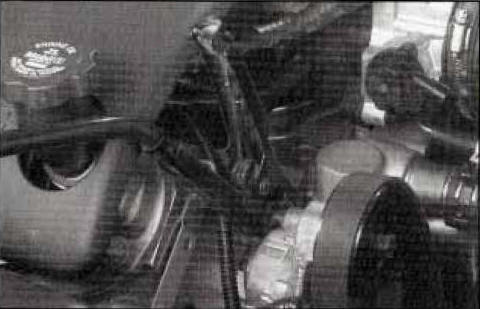
9. The other end of the negative (-) cable doesnít go to the dead battery. It goes to a heavy, unpainted metal part on the engine of the vehicle with the dead battery. Attach the cable at least 18 inches (46 cm) away from the dead battery, but not near engine parts that move. The electrical connection is just as good there, but the chance of sparks getting back to the battery is much less.
10. Now start the vehicle with the good battery and run the engine for a while.
11. ĎTry to start the vehicle with the dead battery. If it wonít start after a few tries, it probably needs service.
12. Remove the cables in reverse order to prevent electrical shorting. Take care that they donít touch each other or any other metal.
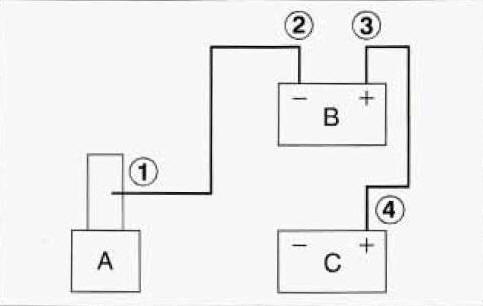
A. Heavy Metal Engine Part
B. Good Battery
C. Dead Battery
Try to have a GM dealer or a professional towing service tow your vehicle. They can provide the right equipment and know-how to tow your vehicle without damage. If your vehicle has been changed or modified since it was factory new by adding aftermarket items like fog lamps, aero skirting, or special tires and wheels, these instructions and illustrations may not be correct.
Before you do anything, turn on the hazard warning flashers.
When you call, tell the towing service:
That your vehicle cannot be towed with sling-type equipment.
That your vehicle has rear-wheel drive.
The make, model and yeaor f your vehicle.
Whether you can still move the shift lever.
If there was an accident, what was damaged.
If the vehicle is to be towed from the rear with a wheel-lift truck, a front dolly will be required.
When the towing service arrives; let the tow operator know that this manual contains detailed towing instructions and illustrations. The operator may want to see them.
Caution:
To help avoid injury to you or others:
Never let passengers ride in a vehicle that is being towed.
Never tow faster than safe or posted speeds.
Never tow with damaged parts not fully secured.
Never get under your vehicle after it has been lifted by the tow truck.
Always secure the vehicle on each side with
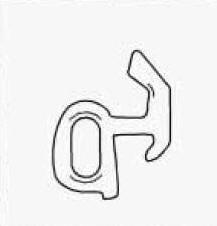
Use only R-hooks.
Caution:
A vehicle can fall from a car carrier if it isnít adequately secured. This can cause a collision, serious personal injury and vehicle damage. The vehicle should be tightly secured with chains or steel cables before it is transported.
Donít use substitutes (ropes, leather straps, canvas webbing, etc.) that can be cut by sharp edges underneath the towed vehicle. Always use R-hooks inserted in the front and rear R-hook slots. Never use J-hooks. They will damage drivetrain and suspension components.
When your vehicle is being towed, have the ignition key in the OFF position. The steering wheel should be clamped in a straight-ahead position, with a clamping device designed for towing service. Do not
use the vehicleís steering column lock for this. The transmission should be in NEUTRAL (N) and the parking brake released.5-9
Tow Limits
-- 35 mph (55 k h ) , 50 miles (80 km)NOTICE:
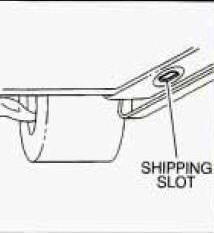
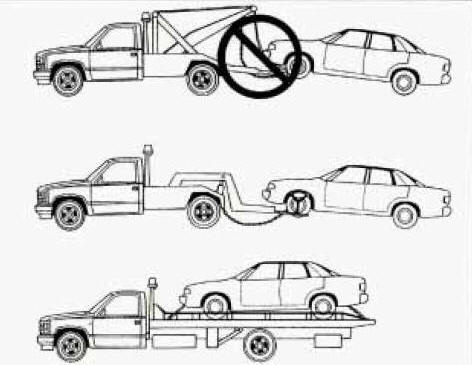
Do not tow with sling-type equipment or bumper, fog lamps and air dam damage will occur. Use wheel-lift or car-carrier equipment. Additional ramping may be required for car-carrier equipment. Use safety chains and wheel straps.Use the shipping slots for car-carrier securing. Donít have your vehicle towed on the rear wheels unless you have to.
If the vehicle must be towed on the rear wheels, donít exceed the tow limits or your transmission will be damaged.Towing a vehicle over rough surfaces could damage the vehicle. Damage can occur from vehicle to ground or vehicle to wheel-lift equipment. To help avoid damage, install a towing dolly and raise the vehicle until adequate clearance is obtained between the ground and/or wheel-lift equipment.
Do not attach winch cables or J-hooks to suspension components when using car-carrier equipment. Always use R-hooks inserted in the shipping slots.
NOTICE:
When using wheel-lift equipment, front tire to ground clearance distance must be a minimum of 17 inches (43
cm) and a maximum of 22 inches (56 cm) or damage will occur.5-10
NOTICE:
Do not tow with sling-type equipment or the rear bumper will be damaged. Use wheel-lift or car-carrier equipment. Additional ramping may be required for car-carrier equipment. Use safety chains and wheel straps. Use the shipping slots for car-carrier securing. When using wheel-lift equipment, a towing dolly must be used under the front wheels or vehicle damage will occur. When using wheel-lift equipment, rear tire to ground clearance distance must be a minimum of 13 inches (33 cm) and a maximum of 18 inches (46 cm) or damage will occur.
Towing a vehicle over rough surfaces could damage the vehicle. Damage can occur from vehicle to ground or vehicle to wheel-lift equipment. Install a towing dolly and raise the vehicle until adequate clearance is obtained between the ground and/or wheel-lift equipment. Do not attach winch cables or J-hooks to suspension components when using car-carrier equipment. Always use R-hooks inserted into the shipping slots.
Do not allow chains to contact springs as damage to springs could result.
5-12
You will find an engine coolant temperature gage on the instrument cluster and a COOLANT OVER TEMP message on the Driver Information Center (DIC).
Overheated Engine Protection Operating Mode
Should a low coolant condition exist and the messages COOLANT OVER TEMP and REDUCED ENGINE POWER are displayed, along with the Check Engine light, an overheat protection mode which alternates firing groups of four cylinders helps prevent engine damage. In this mode, you will notice a loss in power and engine performance. This operating mode allows your vehicle to be driven to a safe place in an emergency; you may drive up to 50 miles (80 km).
NOTICE:
After driving in the overheated engine protection operating mode, to avoid engine damage, allow the engine to cool before attempting any repair. The engine oil will be severely degraded. Repair the cause of coolant loss, change the oil and reset the oil life monitor. See ďEngine Oil, When to ChangeĒ in the Index.
5-13
If Steam Is Coming From Your Engine
CAUTION:
Steam from an overheated engine can burn you badly, even if you just open the hood. Stay away from the engine if you see or hear steam coming from it. Just turn it off and get everyone away from the vehicle until it cools down. Wait until there is no sign of steam or coolant before you open the hood.
If you keep driving when your engine is overheated, the liquids in it can catch fire. You or others could be badly burned. Stop your engine if it overheats, and get out of the vehicle until the engine is cool.
5-14
-. .
NOTICE:
If your engine catches fire because you keep driving with no coolant, your vehicle can be badly damaged. The costly repairs would not be covered by your warranty. See ďOverheated Engine Protection Operating ModeĒ in the Index.
If No Steam Is Coming From Your Engine
If you get the overheat warning but see or hear no steam, the problem may not be too serious. Sometimes the engine can get a little too hot when you:
Climb a long hill on a hot day.
Stop after high-speed driving.
Idle for long periods in traffic.
If you get the overheat warning with no sign of steam, try this for a minute or so:
1. Turn off your air conditioner.
2. Turn on your heater to full hot at the highest fan speed and open the window as necessary.
3. If youíre in a traffic jam,
shift to NEUTRAL (N); otherwise, shift to the highest gear while driving -- AUTOMATIC OVERDRIVE (D) or THIRD (3) for automatic transmissions.If you no longer have the overheat warning, you can drive. Just to be safe, drive slower for about 10 minutes. If the warning doesnít come back on, you can drive normally.
If the warning continues, pull over, stop, and park your vehicle right away.
If thereís still no sign of steam, you can idle the engine for two or three minutes while youíre parked, to see if the warning stops. But then, if you still have the warning,
turn off the engine and get everyone out of the vehicle until it cools down. Also, see ďOverheated Engine Protection Operating ModeĒ listed previously in this section.You may decide not to lift the hood but to get service help right away.
5-15
When you decide itís safe to lift the hood, hereís what youíll see:
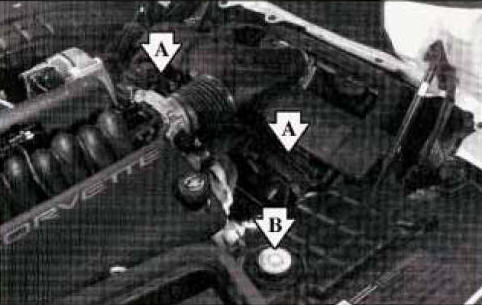
A. Electric Engine Fans
B. Coolant Surge Tank
Caution
An electric engine cooling fan under the hood can start up even when the engine is not running and can injure you. Keep hands, clothing and tools away from any underhood electric fan.
If the coolant inside the coolant surge tank is boiling, donít do anything else until it cools down.
5-16
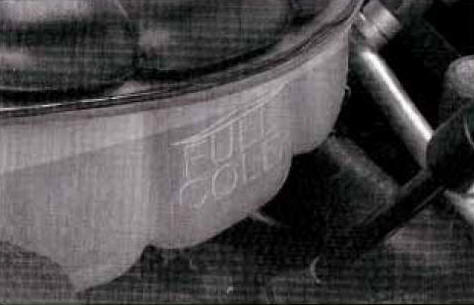
The coolant level should be at or above the FULL COLD mark.
If it isnít, you may have a leak in the radiator hoses, heater hoses, radiator, water pump or somewhere else in the cooling system.
CAUTION:
Heater and radiator hoses, and other engine
parts, can be very hot. Donít touch them. If you do, you can be burned.Donít run the engine if there is a leak. If you run the engine, it could lose all coolant. That could cause an engine fire, and you could be burned. Get any leak fixed before you drive the vehicle.
NOTICE:
Engine damage if you keep running your engine without coolant isnít covered by your warranty. See ďOverheated Engine Protection Operating ModeĒ in the Index.
If there seems to be no leak, with the engine on, check to see if the electric engine cooling fans are running. If the engine is overheating, both fans should be running. If they arenít. vow vehicle needs service.
5-17
How to Add Coolant to the Coolant Surge Tank
If you havenít found a problem yet, but the coolant level isnít at the FULL COLD mark, add a
50/50 mixture of clean water (preferably distilled) and DEX-COOL@ coolant at the coolant surge tank, but be sure the cooling system, including the coolant surge tank pressure cap, is cool before you do it. (See ďEngine CoolantĒ in the Index for more information.)CAUTION:
Steam and scalding liquids from a hot cooling system can blow out and burn you badly. They are under pressure, and ifĎ you turn the coolant surge tank pressure cap, even a little, they can come
out at high speed. Never turn the cap when the cooling system, including the coolant surge tank pressure cap, is hot. Wait for the cooling system and coolant surge tank pressure cap to cool if you ever have tot urn the pressure cap.5-18
Caution
Adding only plain water to your cooling system can be dangerous. Plain water, or some other liquid like alcohol, can boil before the proper coolant mixture will. Your vehicleís coolant warning system is set for the proper coolant mixture. With plain water or the wrong mixture, your engine could get too hot but you wouldnít get the overheat warning. Your engine could catch fire and you or others could be burned. Use a 50/50 mixture of clean water and DEX-COOL@ coolant.
NOTICE:
In cold weather, water can freeze and crack the engine, radiator, heater core and other parts. So use the recommended coolant.
You can be burned if you spill coolant on hot engine parts. Coolant contains ethylene glycol and it will burn if the engine parts are hot enough. Donít spill coolant on a hot engine.
5-19
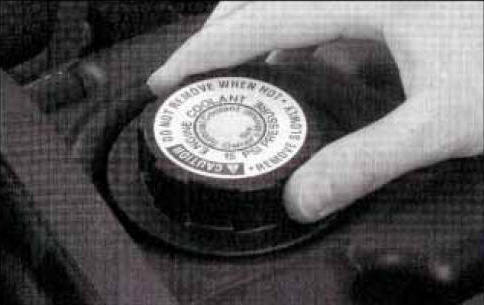
1. You can remove the coolant surge tank pressure cap when the cooling system, including the coolant surge tank pressure cap and upper radiator hose, is no longer hot. Turn the pressure cap slowly about one-quarter turn to the left and then stop. If you hear a hiss, wait for that to stop. A hiss means there is still some pressure left.
2. Then keep turning the pressure cap slowly, and remove it.
.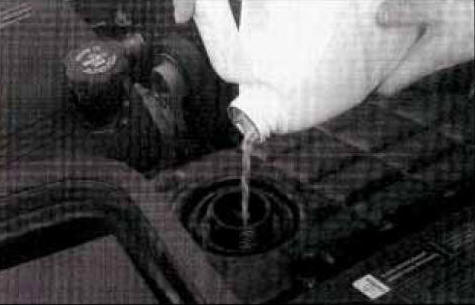
3. Then fill the coolants urge tank with the proper mixture, up to the FULL COLD mark.
5-20
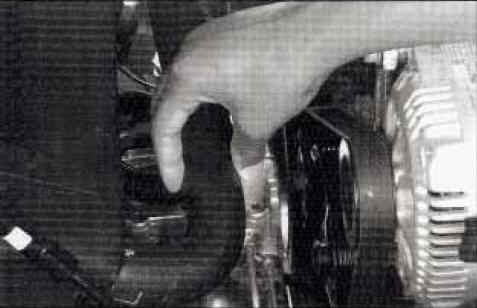
4. With the coolant surge tank pressure cap off, start the engine and let it run until you can feel the upper radiator hose getting hot. Watch out for the engine cooling fans. By this time, the coolant level inside the coolant surge tank may be lower. If the level is lower, add more of the proper mixture to the coolant surge tank until the level reaches the FULL COLD mark.
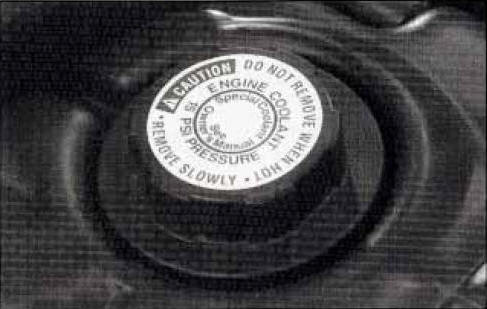
5. Then replace the pressure cap. Be sure the pressure cap is tight.
5-21
Your Corvette has neither a spare tire nor tire changing equipment, because it was built with Goodyear Extended Mobility Tires (EMT). See ďExtended Mobility TiresĒ in the Index.
CAUTION:
Because your vehicle has no spare tire, not tire changing equipment, and no provisions to store a tire in the vehicle, special tools and procedures are required if a tire needs to be serviced. If these tools and procedures arenít used, you or others could be injured and your vehicle could be damaged. Always be sure the proper tools and procedures, as described in the GM Corvette Service Manual, are used.
To order a service manual, see ďService and Owner PublicationsĒ in the Index.
If Youíre Stuck: In Sand, Mud, Ice or Snow
What you donít want to do when your vehicle is stuck is to spin your wheels too fast. The method known as ďrockingĒ can help you get out when youíre stuck, but you must use caution.
CAUTION:
If you let your tires spin at high speed, they can explode, and you or others could be injured. And, the transmission or other parts of the vehicle can overheat. That could cause an engine compartment fire or other damage. When youíre stuck, spin the wheels as little as possible. Donít spin the wheels abov3e5 mph (55 km/h) as shown on the speedometer.
5-22
NOTICE:
Spinning your wheels can destroy parts of your vehicle as well as the tires. If you spin the wheels too fast while shifting your transmission back and forth, you can destroy your transmission.
For information about using tire chains on your vehicle,see ďTire Chainsíí in the Index.
Rocking Your Vehicle To Get It Out
First, turn your steering wheel left and right. That will clear the area around your front wheels. You should turn your TCS System off. (See ďTraction Control Systemíí in the Index.) Then shift back and forth between REVERSE (R) and a forward gear, spinning the wheels as little as possible. For a manual transmission, shift slowly between either FIRST (1) or SECOND (2) and REVERSE (R), allowing the wheels to stop before shifting into gear. Release the accelerator pedal while you shift, and press lightly on the accelerator pedal when the transmission is in gear. If that doesnít get you out after a few tries, you may need to be towed out. If you do need to be towed out, see ďTowing Your VehicleĒ in the Index.
5-23